A brief history of the Everest Base Camp Trekking Routes
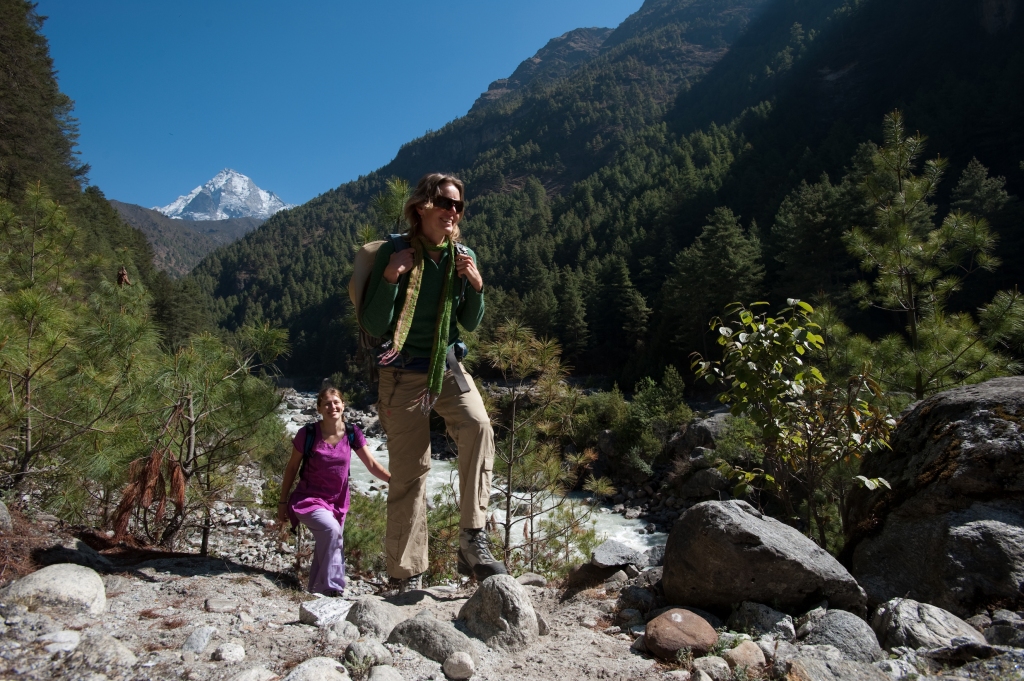
The trek to Everest Base Camp has long been a “bucket list” affair and at one time there was essentially only one trekking route to the base of the world’s highest mountain. Originally the Everest Base Camp Trek started at Jiri, the road head from Kathmandu. Then came the air strip up at Lukla, which cut out several days of trekking in both directions. As this made the Everest Base Camp Trek shorter in duration, this made it become increasingly popular.
At first there was no accommodation for much of the route and for the masses of trekkers coming to pay homage to Everest, camping was the only option. Soon the other name for the Everest Base Camp Trek was the “pink toilet roll trail” as the lack of facilities for tourists meant, well….er…the trail become the toilet.
Things are very different nowadays in terms of accommodation in the Everest region. There are decent trekking lodges (aka tea houses) just about everywhere including close to Everest Base Camp itself at Gorak Shep. The lodges at Gorak Shep may well be the highest “hotels” in the world.

All the various routes converge at Gorak Shep (5140m) as from here it’s the only route to Everest Base Camp
Although not all the way to Everest Base Camp itself, there are even a handful of surprisingly high standard “luxury” lodges too.
For more about these “luxury” lodges see our : How to see Everest In Style guide
Because the trek to Everest Base Camp is a “bucket list” thing, just like the Inca Trail to Machu Picchu and the Marangu route in particular on Kilimanjaro, that need to tick the box understandably attracts more than the usual seasoned and committed mountain hiker. It would reasonable to say that a significant number of inexperienced people attempting to trek to Everest Base Camp have never done any hiking before and also (sadly) some of these are poorly informed and way out of their depth.
All the same the Everest Base Camp Trek just got busier and busier and busier and even now “traffic jams” at peak season are a regular occurrence, particularly when trying to cross one of the many suspension bridges.

Perhaps with the more serious and regular mountain walker in mind, alternative routes to Everest Base Camp were developed over time. A case of “it ain’t what you do it’s the way that you do it”, but also the reality that those that regularly hike in mountain areas just don’t care for busy trails and want their trekking to understandably not be with the masses.
Consequently there are now options to “escape” the main Everest Base Camp Trail, although not in entirety. Rather there are some different approaches up to Everest Base Camp.

So, let’s take a look at the “standard” route and some of the options that divert away from that route too. For the avoidance of doubt we are looking at routes that would still be considered as trekking and are supported by trekking lodges at overnight halts all the way. There are of course other “weird and wonderful” alternative routes to reach Everest Base Camp, but these would require some basic mountaineering skills and supported camping too.
There’s a map at the foot of this article showing all the various route options too.
The “Standard” Everest Base Camp Trek
Call it “standard”, the “original” or the “traditional” route.
This is a linear route and the most direct. Subsequently the shortest too. Same way up and down. A very simple description would be that after flying to Lukla and trekking up to Namche Bazaar via Phakding you head up a large valley for a few days and then at the end turn left to reach Everest Base Camp. You can pretty much see this large valley that you follow for most of the trek in the image below.

But, let’s not get “sniffy” about the standard route. The scenery is spectacular and it is still a very tough trek that ultimately attains extremely high altitude. Completing the standard route (quite a lot don’t) is still quite the achievement.
But, the drawbacks are that it is:
a) Always the busiest route.
b) It’s the same way up and the same way down.
For an example itinerary see: Everest Base Camp Trek
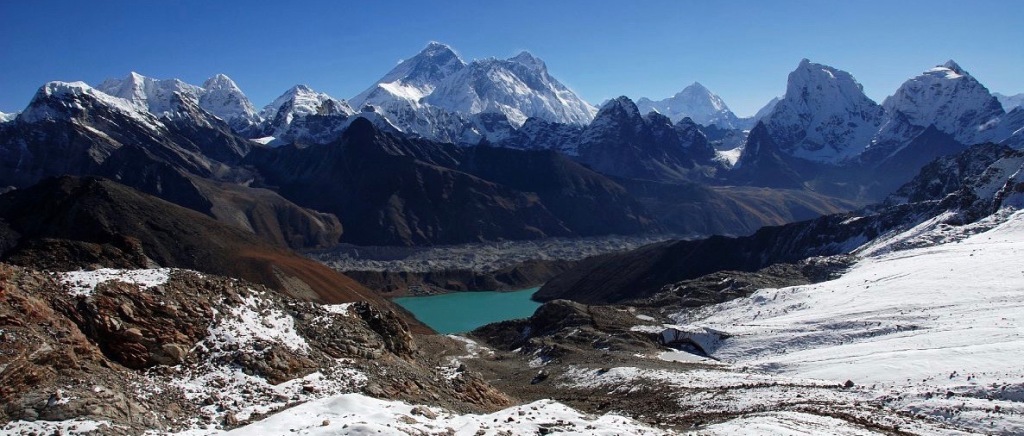
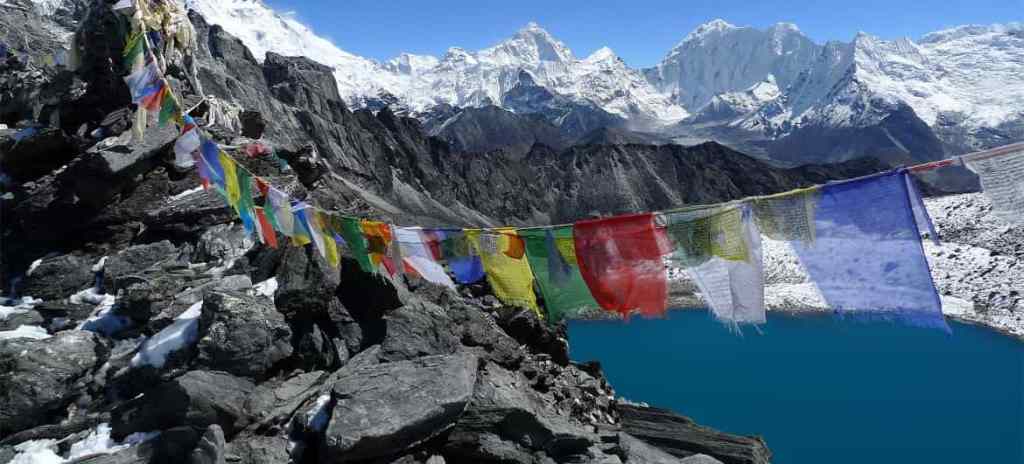
Gokyo Lakes and the Cho La Option
Leaving Namche you’d continue along the standard route for just a further half day before taking a detour to the left and follow a side valley that ultimately leads to the glittering turquoise lakes of Gokyo. To reach Gokyo from Namche, with a sensible acclimatisation day en route takes 5 days.
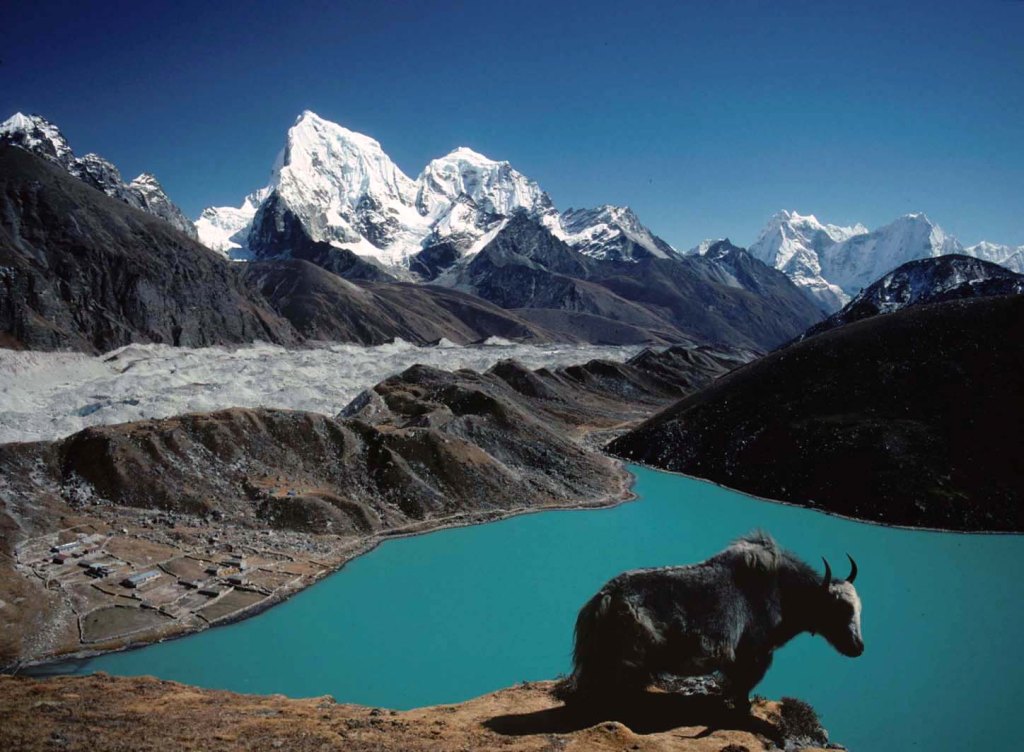
At Gokyo you can “nip up” the nearby mountain known as Gokyo Ri from where there are great views of Everest, as well as way down to the lake and glacier below and many other peaks too including distant Makalu.
Leaving Gokyo you’d cross to the opposite side of the valley by following an obvious trail over the Ngozumba Glacier to Dragnag. The following day you’d cross the Cho La to reach Dzongla. The Cho La is a glaciated mountain pass that reaches 5425m. The route involves crossing a boulder field and an old moraine. At times it is very steep, and a bit of straightforward scrambling is required, as there are bits of loose scree. The pass itself is often snow covered and it’s recommended you have a walking ice axe and in-step crampons/snow grippers with you for this.

From Dzongla it’s a days walk to the lodges at Gorak Shep, from where you can make a return hike to Everest Base Camp itself and also hike up the well worn trail to Kala Patar for the classic Everest view.
The exit route to Lukla would be down the standard trail all the way, unless you added in the Kongma La diversion (see further below).
For an example itinerary of this route see: Ultimate Everest Trek
The Renjo La Option
This option leaves the standard route immediately at Namche Bazaar. It first heads to Thame and pretty much in an instant the hordes of trekkets have thinned out considerably. It’s then up a lesser trekked valley to ultimately reach the tiny village of Marulung (4215m). A couple of acclimatisation days en route are desirable and before attempting the Renjo La.

From Marulung there’s over 1100m of ascent required to reach the Renjo La (5340m). A very early start is required for this very long day. The trail that winds its way up to the Renjo La is often stone-stepped, but it’s a fair old slog at these high altitudes for sure. Prayer flags indicate the pass itself, and from here there are truly gobsmacking views of Everest and the surrounding peaks. The pass and part of the ascent and descent may be snow-covered. It’s steep at first as you drop down from the pass and onto a well-made trail down to Gokyo.
From Gokyo (and thus avoiding heading down to the main trail too) you’d follow the Cho La option above meaning you were off the standard route to Everest Base Camp from Namche all the way to Gorak Shep!
For an example itinerary that combines the Renjo La and Cho La see: Everest The Hard Way
The Kongma La Option
The Kongma La (5535m) is another high pass that can be added to stay off the standard trail and usually this is added on the way back down after visiting Everest Base Camp.
Leaving Gorak Shep you’d descend only as far as Lobuche and spend the night there first. The following day begins by crossing the Khumbu Glacier, for which there’s usually a noticeable trail to follow over the moraine and rubble. The ascent of the Kongma La is rather steep.
Initially you head up a grass covered hillside to emerge onto a scree slope and follow the path that zigs zags its way up and up and up. Beyond the scree slope it’s almost a further hour to the top of the pass itself. It usually takes around three hours to reach the 5535m Kongma La from the glacier. But, the view from the Kongma La is certainly worth it.
As well as the tip of Everest and the fantastic 8 mile-long Lhotse-Nuptse wall, the panorama includes Gauri Shankar, Makalu, Cho Oyu, Pumori and the distant peaks of Tibet. Desending from the pass to the Imja Valley you pass a small (often frozen) lake and drop down into a beautiful yak pasture landscape to reach Dingboche (4410m). After spending the night in Dingboche you’re back on the standard Everest Base Camp trail all the way back to Lukla.
For an example itinerary which combines the Renjo La, Cho La and Kongma La see: Everest Three Passes Trek

Finally a note of caution
It may well be stating the obvious, but as all the routes are challenging and all reach extremely high altitudes it is just plain silly (and potentially dangerous) to attempt a trek to Everest Base Camp without having a good level of fitness and being properly prepared and equipped.
Our previously published articles should be useful in this respect to anyone thinking of trekking to Everest Base Camp.
Preparing for a Trek – Part One – Getting Fit
Preparing for a Trek – Part Two- Choosing Hiking Boots
Preparing for a Trek – Part Three – About Day Packs & Baggage on Trek
Preparing for a Trek – Part Four – About Clothing & Equipment
Preparing for a Trek – Part Five – Altitude
DO NOT EVEN THINK OF GOING TREKKING IN THE EVEREST REGION WITHOUT COMPREHENSIVE TRAVEL INSURANCE.
Read our About Travel Insurance Article. It’s very important!